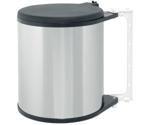
Brabantia Built-in Bin 15L - Reviews
(4.1)
100 reviews
Info
Reviewbucket.co.uk scanned the internet for Brabantia Built-in Bin 15L reviews.
You can find all Brabantia Built-in Bin 15L reviews and ratings on this page.
Analysis
For Brabantia Built-in Bin 15L, 100 customer reviews collected from 1 e-commerce sites, and the average score is 4.1.
Detailed seller stats;
Amazon has 100 customer reviews and the average score is 4.1. Go to this seller.
Detail
Similar Items
6.7.2014
Good quality bin and is exactly what I wanted. Was concerned it wouldn't fit under my sink, but the actual bin lid does not need to lift up in order for it to work as designed, so there is some leeway. I had two goes at installing it. Took about an hour. As others have said, the instructions are poor (Brabantia's cupboard doors appear to lack hinge mechanisms...)Key manoeuvres when installing:Familiarise yourself with all the steps included in the instructions several times before starting, but I don't recommend doing them in that order. You will need a drill, ruler, pencil, screwdriver and pliers. Take the plastic liner out the bin to make it easier. There are three brackets - the larger metal one acts as a hinge,
5.8.2010
I think the title says it all.It's lucky that I count myself as a 'handyman' and have additional items of door furniture to assist me with the installation of the bin, as the diagrams are about 85% helpful and 15% confusing.That the bin can be fitted either left to right or right to left is good.Given that the lid is spring-loaded and requires the door to be firmly shut before laying flat across the top of the bin, this is not an intuitive action in the design.That is because the spring that holds the lid up when you open the door, actually presses against the rim of the bin, so I have had to install a magnetic catch to keep the door closed.Without it, the door remains ajar and the lid raised,
17.12.2011
I purchased this built in bin to replace a different product that was fitted with the kitchen. The installation was straightforward, but once in place it became apparent that the spring in the lid was too strong for my cupboard door, preventing it from closing fully - something that another reviewer had already spotted.The reply to my enquiry email to Brabantia was prompt and helpful - "The springs are quite strong so you can remove one spring which should then allow the door to close."It took just a couple of minutes to grab a pair of long nose pliers, unfasten the lid and remove one of the 2 springs. The cupboard door now closes fine and the bin lid rises when you open the door.If this variable spring strength "feature" was mentioned in the installation guide,
28.1.2011
Price: excellent - cheaper than Tesco or elsewhereEase of fitting: Okay:Assembly instructions has only pictures, but only three items to fit (only drill and screwdriver needed); three points to look out for:1) the bin guide fitted to the door needs to be level with the bottom of the bin not the bottom of the door. (I got this wrong and had to re-fit) - align the guide to the bottom bin first to see the level before you drill the holes.2) do not insert the one-way bin retaining plugs before you clip in the bin: follow the instructions - reall tight fit!3) If the cupboard door does not have a latch (modern ones rely on sprung hinges) you may need to tighten the spring or fit a latch.I would recommend this unit to anyone,
2.2.2013
Really nice quality as you'd expect from Brabantia. Be careful when fitting to really take your time so that everything fits perfectly. After the first stage in the instructions where you fix the main bracket to your kitchen unit I'd recommend temporarily attaching the bin unit to the bracket so you can check the positioning of the bit that screws to the cupboard door and the level of the arm which the lid attaches to. Also check that the part that attaches to the cupboard door clears the kitchen unit ok when closing the door fully, I had to adjust this slightly to be perfect. The lid closes tightly every time. Great design as the weight of the bin is not on the door at all.
28.7.2014
This is a great little bin, it's small enough to fit under the sink but still big enough that it doesn't need to be emptied too often. We are a household of 2 and probably fill 1.5 of these a week which isn't excessive.It was a quite fiddly to fit but then feels really secure and high quality now that it's done so that's forgiveable. The one downside is the lid, it never went on very securely in the first place and now has basically given up and fallen down the back of the cupboard but that's not a big problem in my opinion as the bin is shut away in the cupboard anyway.Overally I'm really happy with this bin as it's a great space saver,
10.9.2019
Now that it is installed I am delighted. The door opens so I can easily drop waste in without making the lid dirty. It is very easy to change the bag which fits perfectly.However, installation was a little difficult. The instructions tell you to drill holes about 10 mm from the bottom of the cupboard. They do not realise that the chuck of a power drill will not allow you to drill that close.I realised that you do not need to attach the bin that near to the base of the cupboard, in fact I raised mine up 100mm which is more convenient height for the bin. This meant I had to do some careful measuring to accurately place the holes. I do have some experience and the tools to do this.
23.12.2013
Our previous bin (different brand) had broken after 10 years' use, so I bought this as a replacement. It's quite large, and only just fits in our under-sink cupboard, along with drainage pipes for the sink, dishwasher, washing-up liquid, and other kitchen-cleaning items - so make sure you measure your cupboard space before buying this. Easy to fit with the supplied instructions, but the lid is fiddly to fit in its correct place so that it opens/closes properly when you open the cupboard. Overall though, a well-made bit of kit, as you would expect from Brabantia.
26.9.2013
I was keen to get an automatic bin that did not rest on the door. This is cleverly designed to fit on the inside panel and the weight of the contents of the bin is on its mounting which prevents the door hinge from wearing out. The pictorial instructions are very good, but the door attachment in my view is best fixed 1cm below what is recommended. The push in lugs are quite hard to insert into its holes. Overall an excellent product which I am sure will last the life time of a kitchen. I would have given it five stars but for the fitting instructions.
2.6.2021
This is a good design, let down by totally inadequate fitting instructions. However, if you read and absorb the many helpful tips left by other users in this thread, fitting is straightforward. It took me about an hour, and I'm a fairly slow worker.I would support the point made by others that you will probably need to fit a magnetic catch to the cupboard door, because of the spring-loaded lid closer.Also, the Brabantia draw-string liners supplied as a trial are very nice, but are eye-wateringly expensive. Other bin liners are available...
5.4.2013
I'd been seeking a new under-sink bin for many months but couldn't find the right one. Then I caught sight of a possibility in an Amazon Ad. The dimensions were right and the price was too good to pass up. So, we took the plunge and ordered same from Amazon. The delivery was swift but the bin was of a different design to our old one - trouble? Not so, although the installation was awkward at floor level and the wee fixing screws were a 'pain'. Summing up,the bin's in and working a treat with a silent lid! David B, S Wales.
10.11.2010
Bought this bin when my old Brabantia eventually fell to pieces after many years of use. Design on this one seems to have gone backwards however with the spring loaded lid difficult to fit...still havn't got it to 'click' into place and when it is situ it prevents the cupboard door from closing properly. Like some of the other reviewers I have had to fit magnetic catches to hold the door closed. Solidly enough made and if it lasts as long as my last one will have no complaints.
4.9.2013
I had to replace a cheap plastic one that fell to pieces. This one is excellent but it didn't quite fit the cupboard size. I knew this when I bought it but as it was only about 3mm too big I reckoned I could get around the problem. Well, I could and did but this is not easy for the average DIY person. I really don't understand why Brabantia don't modify the product to make it suitable for a standard 400mm cupboard unit. If I can do it in my garage, I'm sure they can do it.
4.4.2011
Fantastic bin, fits in the cupbourd under sink snug, still allowing room to store all the normal cleaning products etc. The bin is not huge but in my opinion the best size for a kitchen bin as regular removal you never get a smelly bin. Customer service from Brabantia great also, I accidently broke the inner bucket when cleaning after about 1yr, called Brabantia to order a replacement and they replaced it free of charge, with no quibble. Fantastic.
11.5.2012
Reletively easy to install, just remember to put the top pin in last. Well packaged and a bit wider than our old bin. IT's a solid bin and easy to put the rubbish into as the lid stays inthe cupboard. When installing use a 1.5mm pilot drill for the fixing screws. Anything larger andthe screws will not hold. Can be installed left or right hand door opening, when required again (last one lasted 8 years) will buy same / equvilant again.