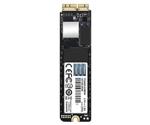
Transcend JetDrive 855 240GB - Reviews
(4.4)
30 reviews
Info
Reviewbucket.co.uk scanned the internet for Transcend JetDrive 855 240GB reviews.
You can find all Transcend JetDrive 855 240GB reviews and ratings on this page.
Analysis
For Transcend JetDrive 855 240GB, 30 customer reviews collected from 1 e-commerce sites, and the average score is 4.4.
Detailed seller stats;
Amazon has 30 customer reviews and the average score is 4.4. Go to this seller.
Detail
Similar Items
4.6.2019
This was easy to install and get working. - I have read a lot of these reviews on here, and I will be honest; You need to be somewhat technical to install this. - When replacing an SSD they don't just magically start working, they ship blank with no data.Both P5 and T5 screw drivers worked fine. I used the P5 to open my MBAir (First time since it left the Apple Factory four years a go!). Used the T5 to remove the screw on the SSD. Ever so slightly lift the SSD half an inch if that or else you will break the connector. Install new transcend drive. Screw new drive in. Screw base back on, done. Put old SSD inside transcend enclosure, use T5 to screw the drive and seal the enclosure.
26.5.2019
I use the 850 240gb drive to replace the 128gb sands drive in my 2015 MacBook air 11 which actually only supports pcie gen 2 x4, throttling this drive's pcie gen3 x4 top performance. The speed of this drive when installed is measured as read 1400mb/s, write 750mb/s, which is very respectable considering the old platform it runs on. The build quality of this drive is actually more solid than the official drive. The pin is shiny gold plated. It also comes with two necessary high quality screw driver. So no need to buy extra tools.I rely on one 16gb and one 256gb external ssd for installing the OS mojave on to the new drive. I create a full time machine backup before everything.
29.10.2018
I bought this to replace a failed SSD in a late-2013 model Mac Pro.As expected, the package does not contain a T8 torx screwdriver (it does contain a P5 and T5 for working on MacBooks), so if you intent to work on a Mac Pro (not MacBook Pro), then you'll need to have your own T8 or buy one.It is a piece of cake to install, and takes perhaps two minutes to remove the old drive and replace it with the new one. There are very easy to follow videos online, but the only tip is to make sure that you do not try to angle the drive in, but slide the old one out vertically and drop the new one in vertically as well.Within a couple of minutes I had the Mac Pro back up and running and booted it holding down the Option key,
27.10.2018
Excellent SSD which made my 2015 MacBook pro even quicker with start up to ready in around 30 seconds. Why the 3 stars ? it came very well packaged with quality tools but installation was a nightmare. I read up on how to do it and watched loads of vids which all basically said the same, screw it in and switch it on, wait for it to connect to network, let it find the new ssd and follow the prompts to restore from time machine" easy..... apart from that's not what happened at all!!! 6 hrs later and after persuading my Apple Savvy mate to come look, we eventually traced it to the fact that the new SSD had not been formatted with the correct file system ready for installing into a Mac.
29.4.2018
Bought for an Apple MacBook Air. Checked serial and model number against the Transcend website and this is what they recommend. Perfect fit!NOTE - it is only for certain MacBooks - so CHECK TRANSCEND WEB SITE - you will have to find the URL yourself as Amazon won't let me post the URL (note to Amazon - not very clever!).Very well packaged and easy to fit and I write this review as the MacBook now downloads OS X onto the new drive - which is not so fast!.NOTE - First time when you reboot on a MacBook you will need to run the disk utility to reformat it from FAT32 to Mac OS Extended. It is a built in option and takes just a couple of minutes.
23.1.2019
boosted my storage with a 480gb drive and very impressed with the kit. comes with screwdrivers so no need for buying the one that amazon recommends.So I installed the SSD and booted up my macbook into the Mojave USB i had made to make a fresh install. however the SSD was greyed out and had an error saying that the SSD was not GUID.So I went back to the main menu and opened Disk Utility. If you try to erase the drive it gives you an option to rename and choose the format. this doesnt work.what I did was click on view in the left corner and select 'show all devices'. now the drive comes up as a bunch of letters and numbers. if you when click erase you can then choose the name, format (Mac OS Extended journaled),
17.11.2017
I'd been looking for a 1TB drive for my 2015 MacBook Air. The alternatives: an Apple-branded one for the best part of £1000; OWC's Aura which appears to have sleep issues; or upgrade to High Sierra and try a generic M.2 drive. Really didn't like any of the options - and then Transcend released its 960GB drive.Easy to fit (I also bought OWC's Envoy Pro case for the 250GB drive I removed) and to transfer all data (via Carbon Copy Cloner). Trim Enabler is reporting benchmarks of 730MB/s write and 775MB/s read - not quite up to the max available on this drive but impressive.It's expensive when compared with a generic Samsung or SanDisk equivalent (hence only 4 stars)
17.12.2018
The SSD on my wife's MacAir suddenly stopped working. This was a good replacement and has more capacity than the original. Fortunately, I was able to recover most of her data from the old disk and backups. Physical installation was easy - the difficult and time-consuming part was restoring the data. So far, it has worked well.
11.10.2019
After having reboot problems with a previous replacement drive for a Macintosh Pro (mid 2013) model, I decided to try the JetDrive as a replacement. At less than half the price of the first drive it seems to have overcome the spurious reboot problems of the first drive.Shame I hadn't found this earlier!
17.1.2020
Very good product. Make sure you use another external USB drive to store the TimeMachine back-up. Use the same password for the TimeMachine back-up as your regular password on the Mac. Restore from the USB external drive onto the new SSD after you’ve installed it physically in the Mac.
28.9.2019
I am not a geek. Have never opened a laptop before. But in less than 5 mins I had installed the Transcend drive, and after re-installing the saved data all was well. Do check out the Transcend website for precise details of re-loading software and data - it helps.
9.2.2020
Struggle a bit with restoration of my system but eventually I figured out a way around it...The only disappointment was the T5 screwdriver, broke before I finish putting the parts back. Had to purchase a new one from a third party vendor
4.5.2019
No slower than the original - the interface dictates that anyway. Replaced my original drive that fell over. Simple job. Less expensive than an Apple replacement but still costly compared to similar devices with a different interface.
11.9.2019
Worked very well with my Macbook Pro late 2013. The only thing is that if you want to use the old ssd with Windows as well, you need to reformat the drive (not from disk utility, though), there are tutorials on the web.
18.12.2018
Works perfect with my MacBook Air,beware,you cant just fit this and everything works,it takes a fair bit of online research to get it all to work correctly,i would definitely use transcend again